THE ART AND PROCESS OF PHOTOGRAVURE

What is Photogravure?
Photogravure is a 19th century process that etches a photograph onto copper plate, which is then printed on a traditional etching press. The resulting images are valued for their deep shadows, luminous highlights, and wide tonal range.
Like all intaglio printmaking, photogravure plates are inked by hand and each image in the edition is printed individually. Because the printing process is manual, there are subtle differences between images. Due to these differences, each image in an edition is an original in its own right.

Creating a Photogravure
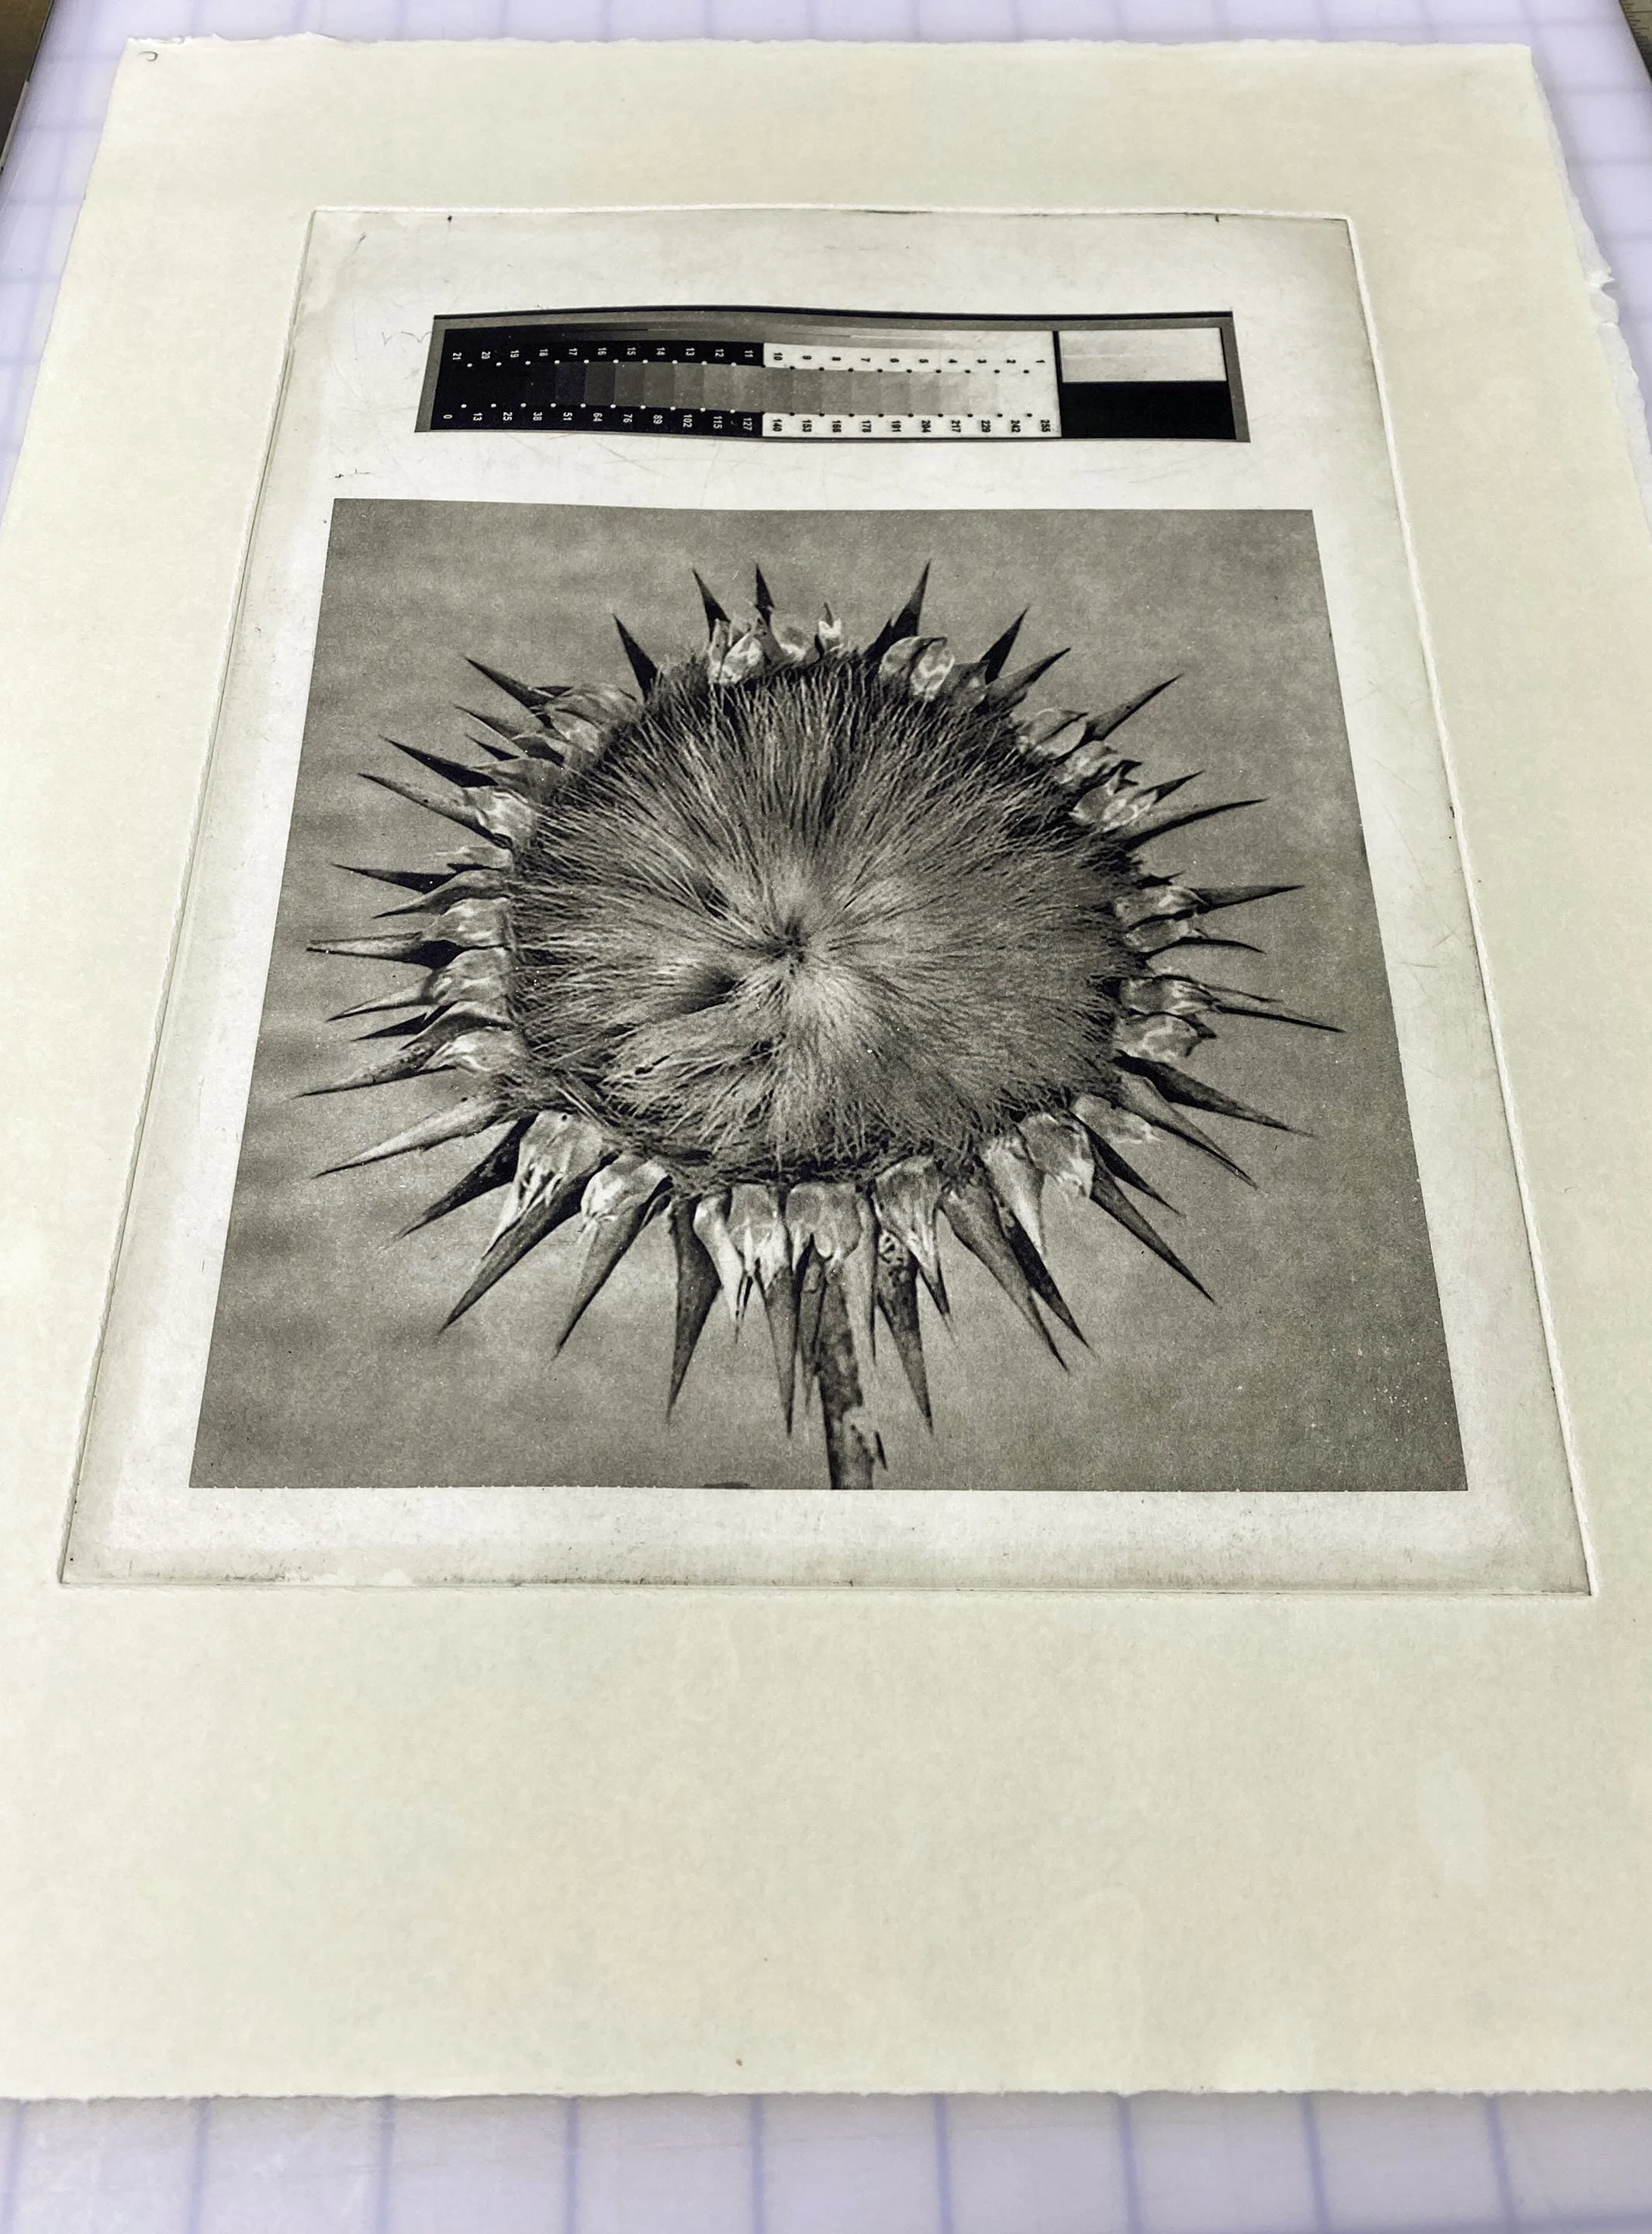
For this demonstration, I am using an image of an Artichoke Thistle by photographer Denise Fuson, of Baton Rouge, LA.
Start to finish, creating a photogravure consists of seven stages:
Image capture and processing in software
Printing image onto transparent film using inkjet printer
Image exposure onto tissue
Tissue lamination to copper plate
Plate drying and preparation for etching
Etching
Printing
Preparation Steps: Before we create a plate, we do some pre-checks in the darkroom...

Temperature & Humidity
Room humidity must be between 45 - 65%. Room temperature should be between 70 - 73 degrees F.

Sensitize Gelatin Tissue
sensitize my gelatin tissue in a potassium dichromate bath on the same day that I create the etched plate. I find this produces the most predictable results for downstream processes

Acid Bath Density
Our process uses a single etch of Ferric Chloride at 41° Baumé. We measure the Baumé and adjust if needed.

Check List
Due to the many steps involved, it is easy to forget the details. I always bring a checklist into the darkroom with me so that I don't forget or miscalculate a step.

Alcohol Density
The plate drying process requires the plate to be agitated in a bath of 50% alcohol solution, and later a wash of 70% alcohol solution. We measure alcohol densities and adjust if needed.

Clean & Organize
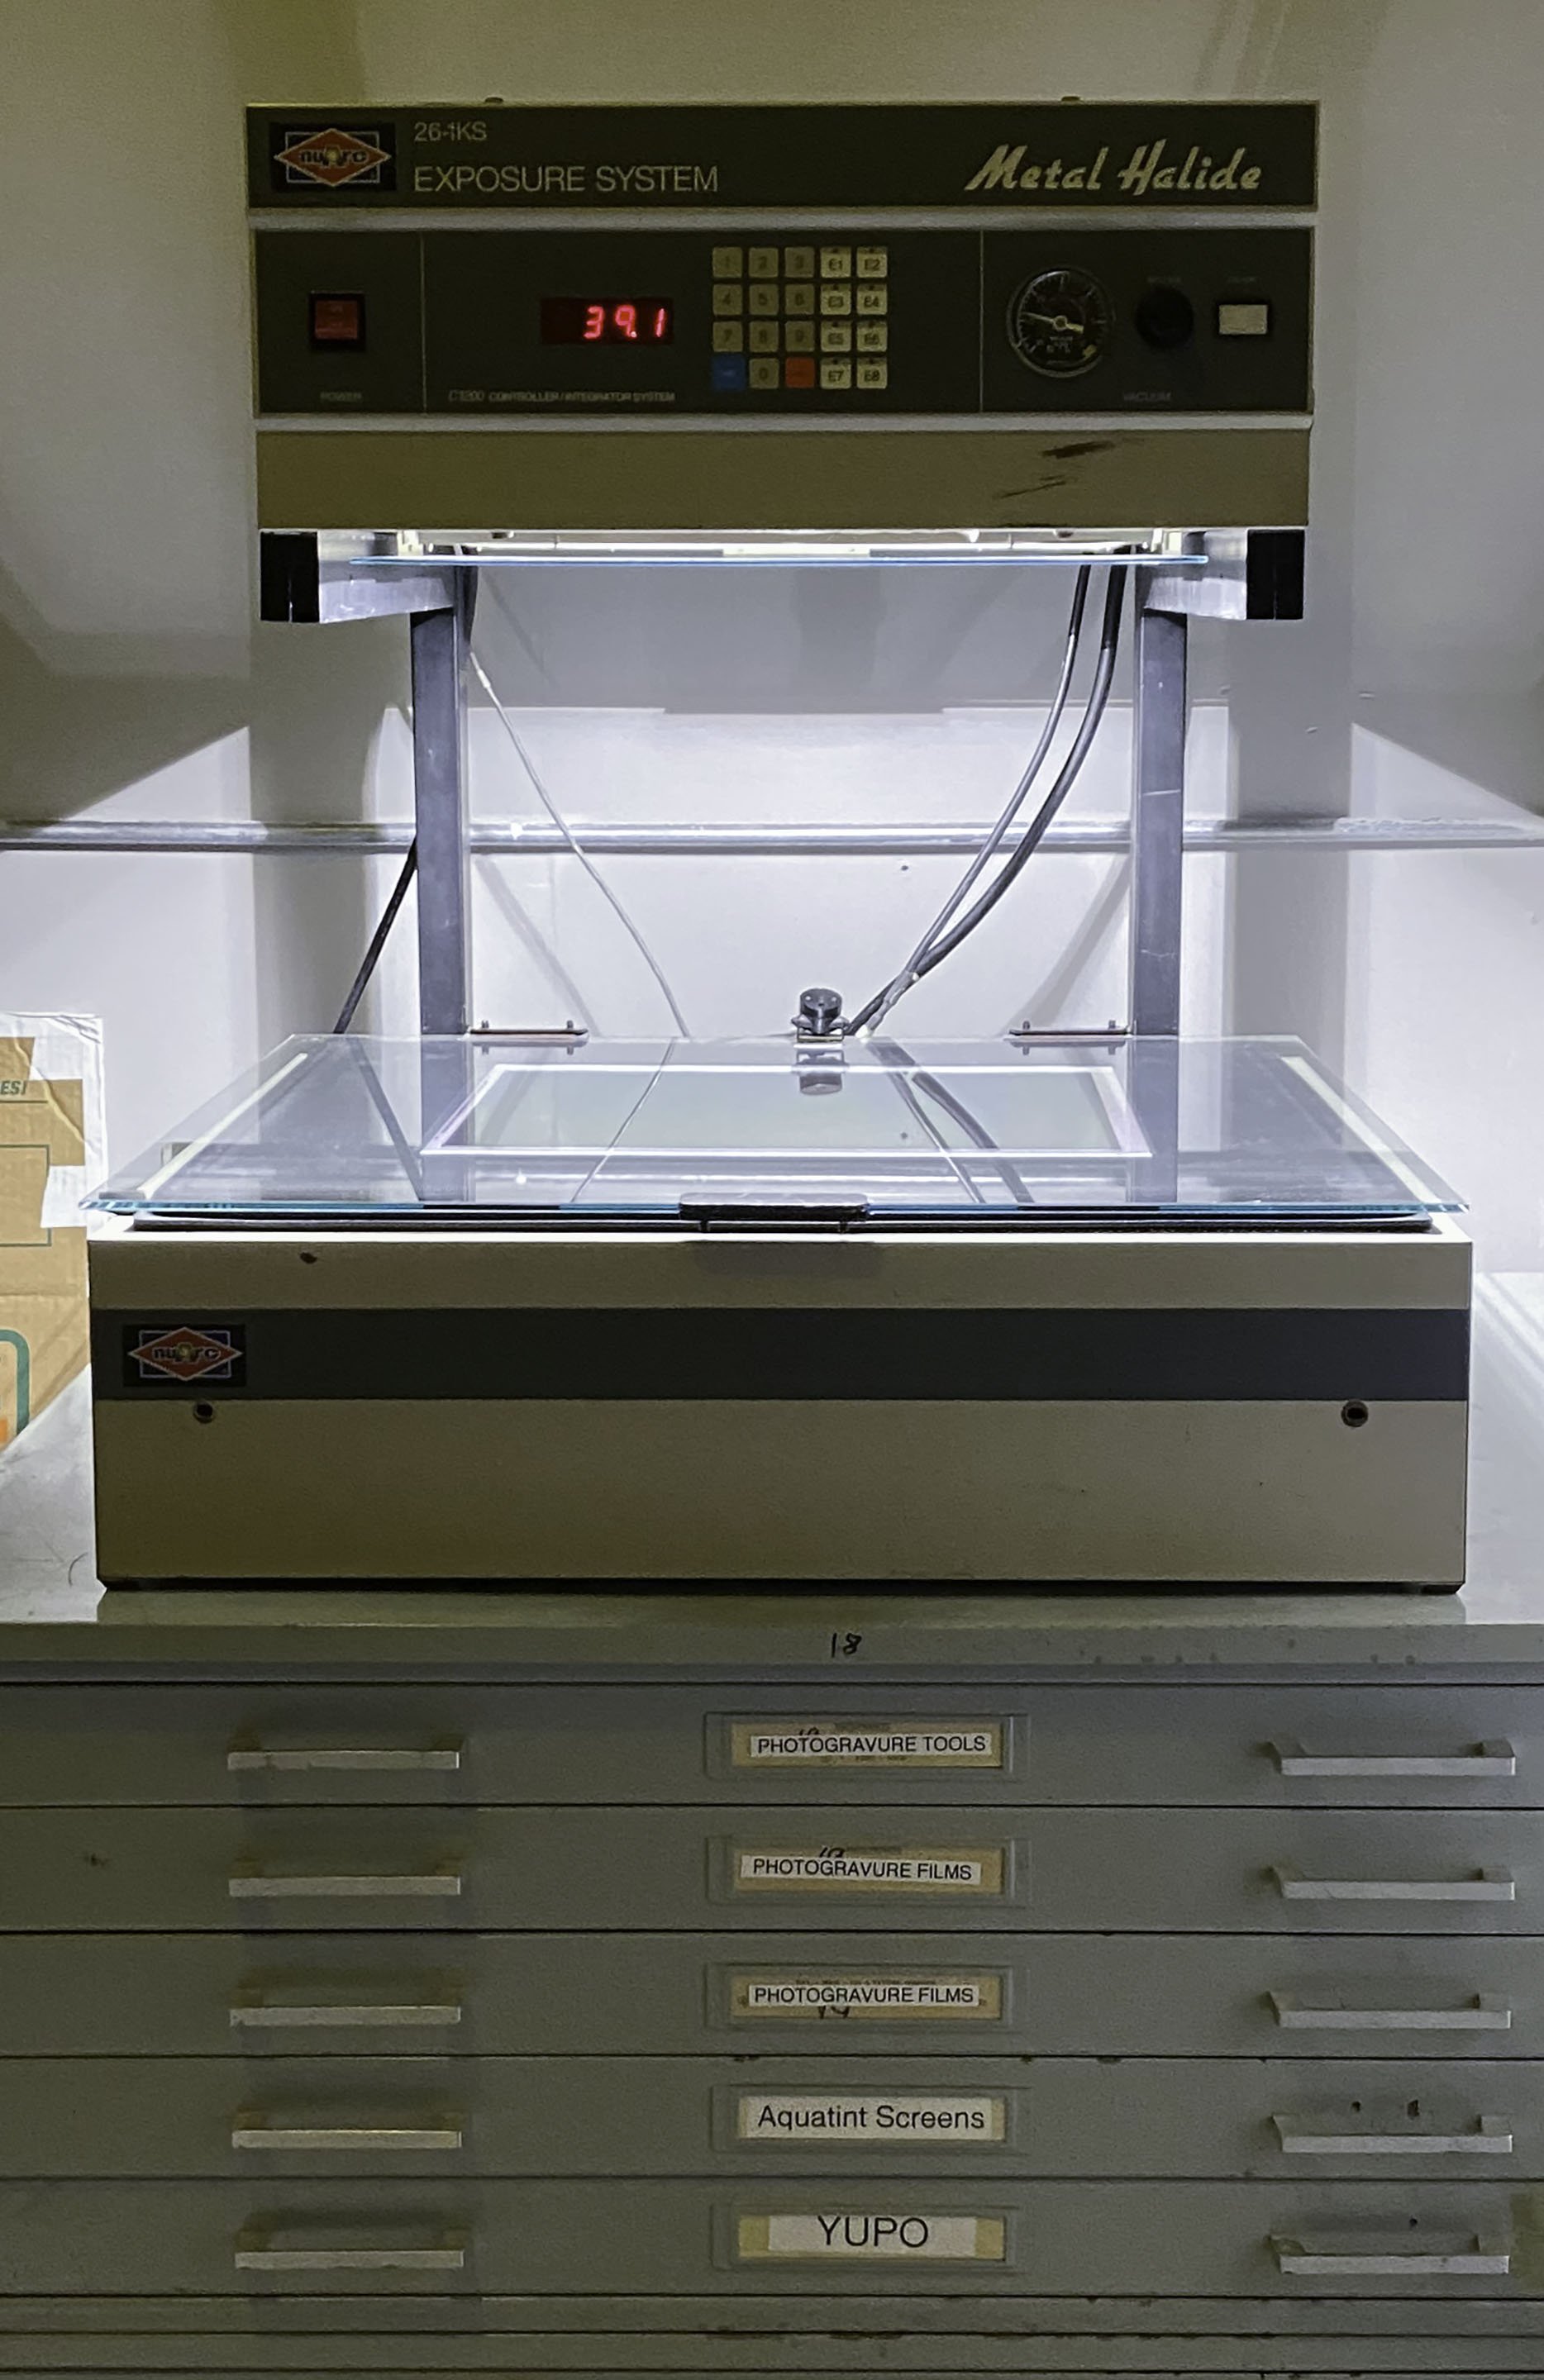
All work surfaces are cleaned and dried, including the exposure unit vacuum frame, to avoid contaminating the delicate gelatin tissue.
Exposing the Tissue: performed in two steps: Aquatint Exposure (allows achievement of a wide tonal range), and exposure of the film image positive.

Cutting the Tissue
We expose the film image onto photosensitized Dragon Tissue, which we cut to a size that is larger than the film, yet smaller than the copper plate.

Vacuum Adjustment
Vacuum pressure flattens the film and tissue so as to produce an evenly exposed image, with no peaks or valleys.

Secure the Tissue
The tissue is temporarily taped to a sheet of Yupo (synthentic paper), which protects the tissue from the vacuum mat.

#2: Image Positive
The film positive is exposed after the aquatint exposure. Exposure time for both steps on the Nuarc26-1KS, for my environment and workflow,is 40 units.

#1: Aquatint Screen
We use a hand-made Stochastic image on film as our aquatint layer. This exposure unit uses a single-point overhead Metal Halide bulb, and a vacuum bed to adhere tissue tightly to the glass to prevent warping/curling.
Let There Be Light!
Once I set the exposure time and flip the switch, I leave the room and let the exposure unit do its thing. As a former Florida resident, I have already gotten my own personal share of UV exposure!
Tissue Lamination to Plate
Tissue lamination is a three stage process: A cold water bath for adhesion, a hot water bath for gelatin expansion and hardening, and alcohol drying.. We use a Hass Intellifaucet E375 to regulate our water temperatures quickly and accurately for this demanding process.
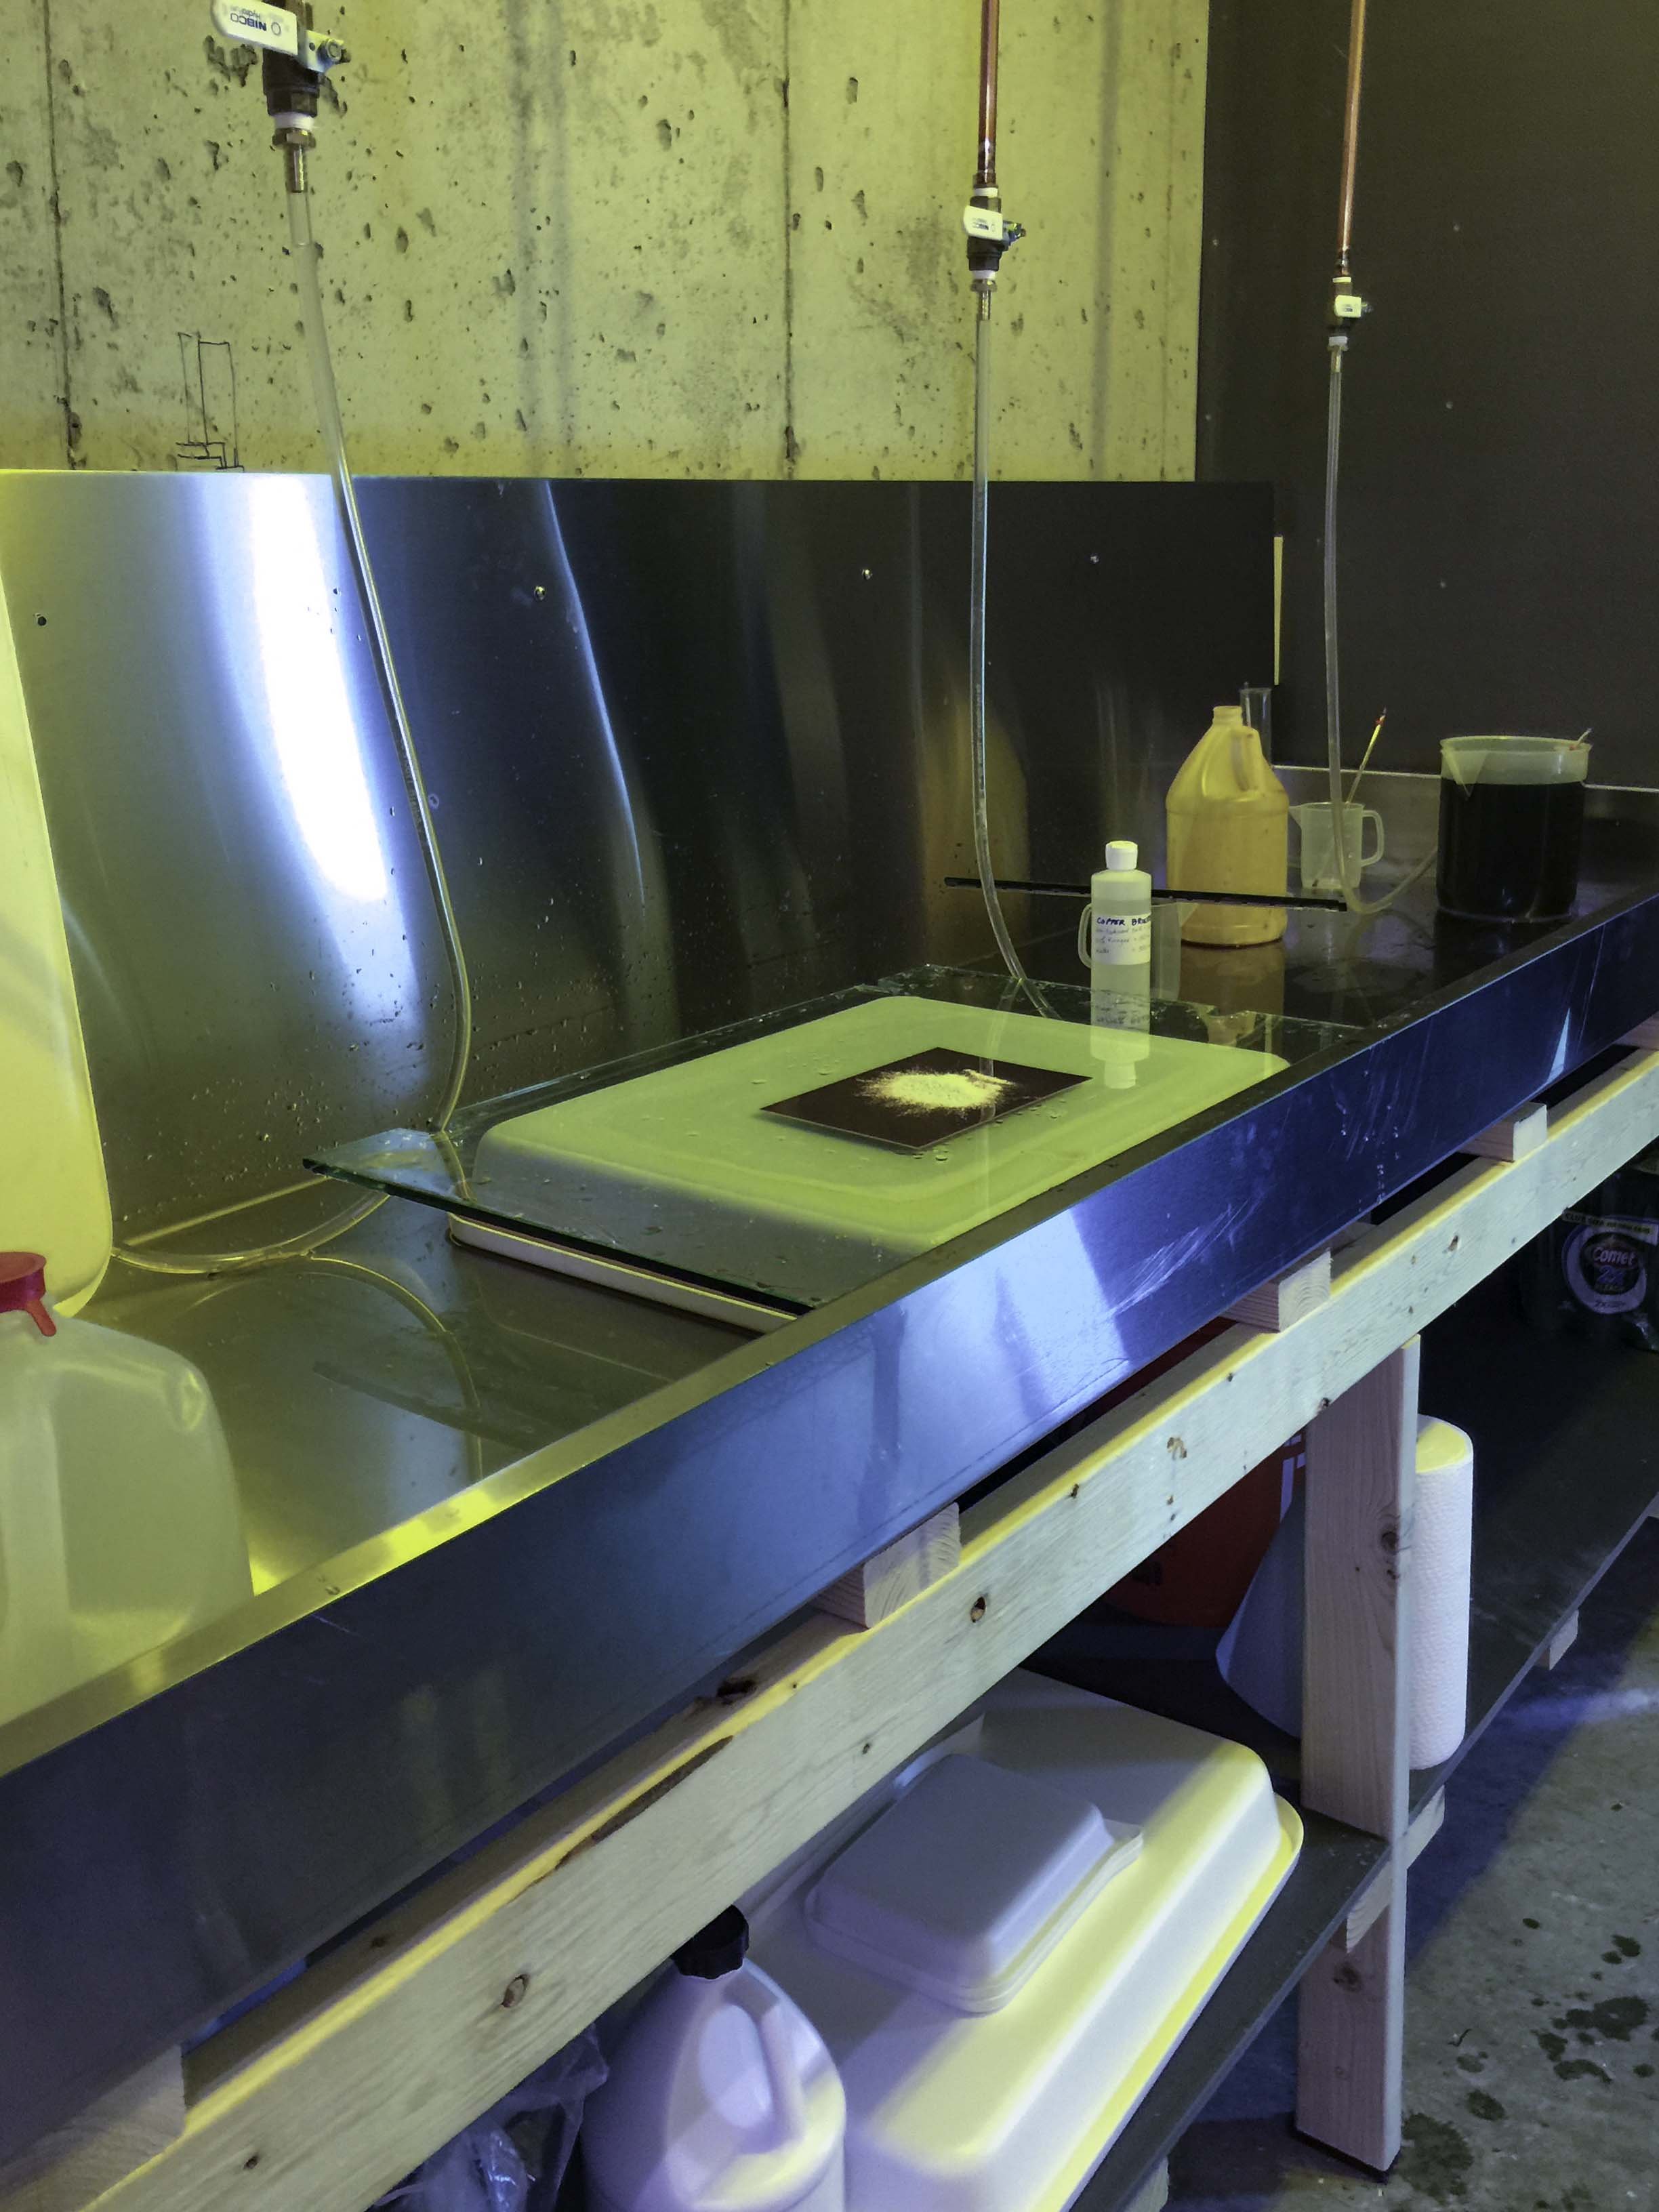
Clean Copper Plate
We used mirror-finished copper for our plates. Before use, they must be degreased with Comet, then splashed with an acetic acid and salt solution. This ensures contaminants that interfere with tissue lay-down are not present.

Water Baths
The cold water bath is used to get the tissue to stick to the copper plate (using a squeegee). It requires immersion in distilled water @ approximately 42° F for 1.5 minutes, and a resting period of 3.5 minutes. The later hot water baths (one still for 1.5 minutes, and one agitated for five minutes) requires a temperature of 115° F. The plate then air-dries for no more than one minute.

Alcohol Baths
The plate drying step continues with a constantly agitated 50% alcohol bath for two minutes, followed by two consecutive 30 second flows of 70% alcohol. The plate is then carefully air dried in 65% humidity using a light, distant fan and very low blow dryer for local spot drying if needed.
Etching The Plate
Photogravure plates are etched in Ferric Chloride at either 40 or 41° Baumé , depending upon the exposure time and temperature/humidity of the darkroom, and temperature of the acid itself. A lower Baume etches faster. A warmer Ferric also etches faster. I nest my Ferric tray inside of a larger tray: if the plate is etching too slowly, I will speed it up by adding water to the outer tray that is slightly warmer than the Ferric in the inner tray.

Masking & Heating
Before we etch a plate, we need to mask out the parts of the plate that we don't want etched. Once masked, the plate rests on a 130° hot plate for 20 minutes, then is permitted to cool. Prior to etching, we inspect the surface of the plate for any pinholes in the gelatin and stop them out with a Sharpie so that they do not cause defects in the etch.

In The Acid Bath
Etching time is usually around 23 - 27 minutes. We like to etch a Stauffer scale along with the image to let us measure our progress and make any adjustments to the bath that might be needed. We also know with reasonable certainty when it is time to stop etching.

Final Results
As soon as the etching appears to be completed, the plate is removed from the bath and flooded with cool water to stop the etching. The gelatin tissue is carefully yet quickly removed from the surface, and the plate is polished. After proofing, this plate will be trimmed to include a 1/4 inch safety edge for handling.
Printing The Plate
Once the plate is created, it needs to be "proofed" to see how well the etch turned out. The first image is usually not great The second print will benefit from residual ink from the first printing, and show more details and tonal separation. Decisions need to be made about what ink and conditioners should be used, and in what proportions. A paper that expresses the image well must be chosen. A dozen proofs or more can go into ink and paper selection for editioning.

Inking
We use oil based inks and condition them with modifiers to achieve the expected tonal range for copper plate photogravure. We apply the ink to the heated plate using a soft rubber brayer. The plate will then be wiped with a stiffened cheese cloth until only the ink in the recessed wells of the plate remains.

Printing
The plate is printed on a traditional etching press. Prints are pulled one at a time, and require the plate to be re-inked and re-wiped each time.
First Printing
Our thanks to Denise Fuson for allowing us to use her image for this demonstration!